Editing printed procedure format
 Similar questions: How to rename fields and columns of the printed Lockout file? Where to increase
the number of lines in Seal # section? Where to disable printing the Return to
service section? How to add or remove a column from the printed procedure template?
Similar questions: How to rename fields and columns of the printed Lockout file? Where to increase
the number of lines in Seal # section? Where to disable printing the Return to
service section? How to add or remove a column from the printed procedure template?In  go to
go to  section
  within it.
Click on  to modify the default printed format that exists for all units, except for those who have
  .
.
First section to the right from the menu allows to
edit the Reason for work and Work order fields – possible to rename them and
select Number of lines for each (from 1 to 5 lines)

Each change that is made to the Printed Procedure Template
has to be published before it’s applied. If changes have not been published –
existing printed file format is not changing.
If Seal Log is not enabled – it stays just as one
line for indicating the Seal #, but once it’s enabled – the number of lines may
be selected from 1 to 5 as well as columns of the log may be renamed.
It is recommended to name columns and fields using
terminology that is used in company’s practices to avoid confusion once Conformit
software solution is deployed for the broad use by employees.
Participants of the Lockout and Verification
process will be listed in the section “List of Collaborators”. Names of their
roles and number of lines can be changed as well as in previous sections:
Rows in this section can be deleted  or added
  to better reflect the existing or desired
company Lockout file format.
to better reflect the existing or desired
company Lockout file format.
It is possible to decide whether sections with
required lockout material and return to service steps should be printed or not
(by checking/unchecking relevant box):
All the changes made in the left part of the
modification page are immediately displayed in the Template to the right, but
not applied to the format until confirmed to be published.
Section for Procedure Steps Columns allows to
select which columns should be displayed or not displayed, change the title if
necessary, change position of the column as well as select from the drop-down
list for certain column what information they’re designated for:
Moving the order in which these columns will be
displayed in the printed format is possible by grabbing them in the dotted area 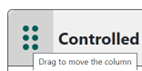 and dragging or by clicking on arrows
 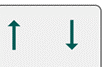 to change the position and following changes
in the Template example on the right side of the page.
to change the position and following changes
in the Template example on the right side of the page.
Related Articles
Creating a printed format specific to organization unit
Similar questions: How to create a unit-specific template of the lockout procedure? How to customize a printed format for certain organizational unit only? How to make different lockout forms for different facilities within the same tenant? ...Status watermark on printed LOTO procedure
Similar questions: How to indicate a LOTO status on the procedure? How to inform final user that procedure is not in Approved status or has Expired? Within go to tab and open the Lockout workflow that you wish to activate Watermark function for ...Editing device information without closing the Lockout Procedure
Similar questions: How to quickly switch to device details to correct errors without closing the Procedure that is being built? Is there a quick link to access device details when creating the Lockout Procedure, without having to switch to Isolating ...Editing an isolation step instruction
Editing an isolation step instruction Similar questions: How to edit device position in the isolation step? In the module within section select the procedure that you wish to edit isolation steps for or find it in the list if you have just created ...Editing a shutdown step with a device
Editing shutdown steps implying a device Similar questions: How to change an instruction for the shutdown step? How to edit device position in the stop step? For steps without devices (instructions only) it may be edited by selecting a different ...